Seer/Mackerel/Neymeen/നെയ്മീൻ Fish Curry - Kerela style
 |
TasteTellTale
The 1st recipe that I am posting as the inauguration recipe of this blog is Seer Fish Curry. This recipe is really special for my MIL for a number of reasons. Every time she takes out the earthen pot (or chatti as she calls it), she never fails to mention that this was her fathers favorite fish curry and all her 7 brothers and sisters used to enjoy this as kids. I can see the spark of beautiful childhood memories in her eyes as she mentions all this. Even today, whenever her brother visits us from Singapore, this curry remains his special and only demand from his sister.
As I have mentioned in the blog introduction, she was born and brought up in Bhilai, Chattisgarh. This fish used to come by a Waltair train to Bhiali. It used to take more than 2 days for the train to reach Bhilai before Aaryav's(my son) great grandpa could bring this home for the family to relish.
Other than unanimously winning the tastiest fish curry award among masses, Seer fish has many many health benefits which are regularly mentioned my MIL while preparing the curry. The fish oil is good for eye sight. It contains heart-healthy omega-3 fatty acids, which lower triglyceride levels as well as help reduce inflammation throughout the body and support brain health. It also contains protein, vitamin B-12 and selenium. Seer Fish contains high quantity of protein (21.34%) and calcium and phosphorus which helps in the conditions like osteoporosis and arthritis.
The fish is not only good for kids for being nutrient rich, its also easier to eat as it is very soft and doesn't have many bones or thorns. And so, its fair to say that this delicacy is liked by all!
Recipe
Serves : 5-6 people
Preparation Time: 40 mins
Ingredients:
Basic Ingredients
Seer Fish - 1 kg
Kodumpuli - 1, soaked in water
Salt to taste
Water for cooking 400 ml. approx
For Masala
Coconut - 1 medium, scraped
Garlic - 5 big florets nicely sliced
Ginger - 1.5 inch
Coconut oil - 3 tsp for masala
Black Pepper whole - 1 tsp
Fenugreek seeds - 1/2 tsp
Curry Leaves - 15
Green Chilli - 3 long, nicely cut
Sambhar Onion - 8 florets
Red Chilli Powder - 2 tsp
Coriander Powder - 3tsp
Turmeric powder - 1tspFor Tempering
Mustard Seeds - 1/2 tsp
Coconut Oil - 2 tsp
Curry Leaves -5
Sambhar Onion - 10 thin sliced
Steps:
Prep
- Clean the fish with water mixed with salt and turmeric. Keep Aside.
- Soak Kodumpuli in water. Keep Aside.
For Masala
- Dry roast Black Pepper and Fenugreek seed for 1 min, till you get a nice aroma.
- Add scraped coconut, coconut oil, sambhar onion, green chilli, ginger, garlic, curry leaves.
- Roast on high flame, stirring continuous till the mixture turns light brown in color and you start feeling the crispiness.
- Add Turmeric powder, coriander powder and Red Chilli powder at this point, and give the mixture a final stir.
- Let it cool to room temperature.
- Grind the mixture to a fine paste, add water if required. Keep Aside as curry masala.
For Tempering
- Take an earthen pot, add 2 tsp coconut oil for tempering.
- Add mustard seeds, allow them to splutter
- Add sliced sambhar onion
- Fry till the onion turns golden brown. Add 5 curry leaves.
Final Assembly
- Add fish to the tempering. Cook for 4-5 mins. The fish should be partially cooked. At this point, the fish turns whitish in color.
- Add whole Kodumpuli, with water in which it was soaked at this point.
- Add prepared masala, salt to taste and water for gravy. Simmer the gas and cook for 20 mins.
Step By Step with Pictures
 |
Kodumpuli (Garcinia cambogea) |
 |
Kodumpuli Soaked in water |
 | ||||||
| Cleaned fish blocks with turmeric and salt |
 |
| Sambhar Onions |
 | |
| Sambhar Onion Peeled |
 |
| Dry roasting fenugreek seeds and black pepper |
 |
| Prepping Masala |
 |
| Roasting Masala ingredients with coconut oil |
 |
| Adding spice powders to finally roasted masala |
 |
| Preparing tempering |
|
| Adding fish to the tempering |
 |
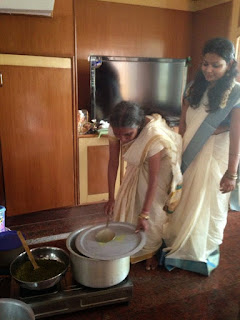
| Our kitchen |
PS: This curry tastes better the next day as the fish absorbs all the flavours of the masala.
Some pictures (grounded masala, e.g) are missing. We will add those whenever we prepare this curry next time at home.
But do try this recipe at your home and let us know in comments section how it turned out.
Bon Appetit!
Comments
Post a Comment